Filezilla is an ‘opensource’ or free FTP client and can be downloaded for free from http://filezilla-project.org/. Filezilla is available for multiple platforms.
Once you have the program downloaded and installed; open it up. The first thing we need to do is set the program to connect to your web host. You will need the following information:
Address: Your FTP server can be found next to the corresponding user on the accounts table in your FTP Manager.
User: your ftp username
Password: your ftp password
When you open the program for the first time you need to enter in all of your connection information to connect to the website. This can be done in one of two ways. If you have many FTP sites, you will want to keep them organized by using the ‘Site Manager’. If you’re only managing one site, use the ‘Quickconnect’.
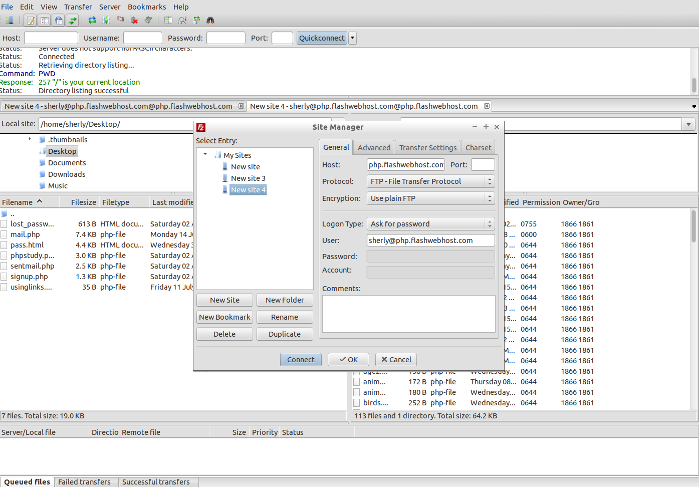
Site Manager
Click File.
Select the first option; ‘Site Manager’.
A window will open called ‘Site Manager’. On the left you see a yellow folder that says ‘My FTP Sites’ and on the right you see ‘Site Details’. Make sure ‘My FTP Sites’ is highlighted.
Down in the lower left hand corner click the button that says ‘New Site’. A new FTP site connection will appear, give it a name that will help you to remember what website it is. You will now be able to enter all of your information into ‘Site Details’.
Enter all of your information into ‘Site Details’.
Host: In your ‘Connecting with FTP’ information this is ‘Server or Host Name:’
Port: is always 21 and is usually pre-filled in most FTP programs.
Server Type: Leave as FTP or select SFTP (recommended)
Logontype: Set to ‘Normal’
User: enter the information from ‘User Name:’
Password: Enter your flashwebhost password
Hit Save and Exit.
Once you have created your connection you can connect to it by going to File -> Site Manager. Under ‘My FTP Sites’ select your website and click ‘Connect’ down at the bottom this will then connect you to your website.
OR
site manager Look to the icon bar in the upper left of your application. Click on the arrow within the ‘Site Manager’ icon. A list of your sites will drop down and you can choose the one you want to connect to.
Quickconnect
You can also create a quick connection:
At the top of the screen you will see four input boxes: Address, User, Password, and Port.
Enter your address in the Address Box.
Enter your user number in the User Box.
Enter your flashwebhost password in the Password box.
Leave the port as is.
Click ‘Quickconnect’. This will connect you to your website.
You can quickly and easily connect to your website – click on the arrow next to ‘Quickconnect’ for your list of quick connect sites.
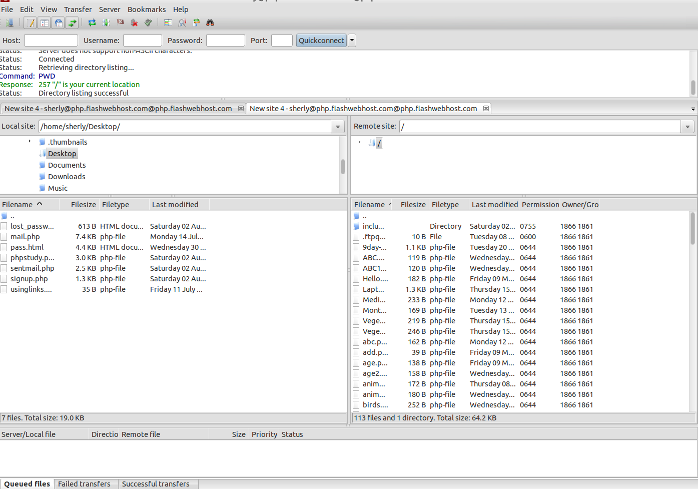
After connecting; on the right hand side under ‘Remote Site’ you should see either one or two folders. If you have a Flashwebhost Hosting account you should see a folder called: yoursubdomain.flashwebhost.com. Double click the folder, now you are in the root directory of your website. This is where you will save your files.
If you have a flashwebhost Hosting account you will see two folders: one named ‘logs’ and one named ‘web’. Double click the one named ‘Web’. In this folder you will see another folder with your domain name, double click this folder and you will be in your root directory. This is where you will save your web documents.
Now you can begin uploading your web files.
Uploading Files
On the left side you will see a pane that says ‘Local Site’. There you can browse through all the files currently on your computer.
To upload a file to your site:
Navigate to the file(s) that you wish to upload on your computer.
If you want to upload the file(s) to a certain location on your website (ie. a folder called ‘images’) make sure you have opened that folder by doubling clicking it in your ‘Remote Site’ pane.
Select the file(s) (click to highlight them).
Right Click your file(s) and select Upload.
This will upload the file(s) to your website.
If you need to create a folder in your website, do so by right clicking anywhere in your ‘Remote Site’ pane and selecting ‘Create Directory’. Enter a name for your folder and click ‘OK’.
TIP: You can upload more then one file at a time! To upload more than one file at a time SHIFT+CLICK all the files (as long as they are grouped together). If the files are not grouped together CTRL+CLICK all the files you wish to upload. Once you have all of the files selected, right click and select upload. You can also upload a folder and all of its contents by selecting the folder.
REMEMBER – Local Site is your computer and Remote Site is your website!
Downloading Files
Downloading files is the exact opposite of uploading. Select your files in your ‘Remote Site’ pane and Right Click and select Download. You can copy entire folders, create new folders (Directory), and do everything just the same as when uploading.
Renaming Files
You can rename any file or folder by Right Clicking the file and selecting Rename.
Deleting Files
You can delete any file or folder in one of two ways. Right Click and select Delete. Or click to highlight the file and hit the ‘Delete’ button on your keyboard. It will ask you; ‘Really Delete “FileName”‘ make sure you have selected to delete the correct file, and if you are SURE you wanted it deleted select ‘OK’. Once you delete something it is GONE and can only be uploaded/downloaded again if you have a backup copy.
