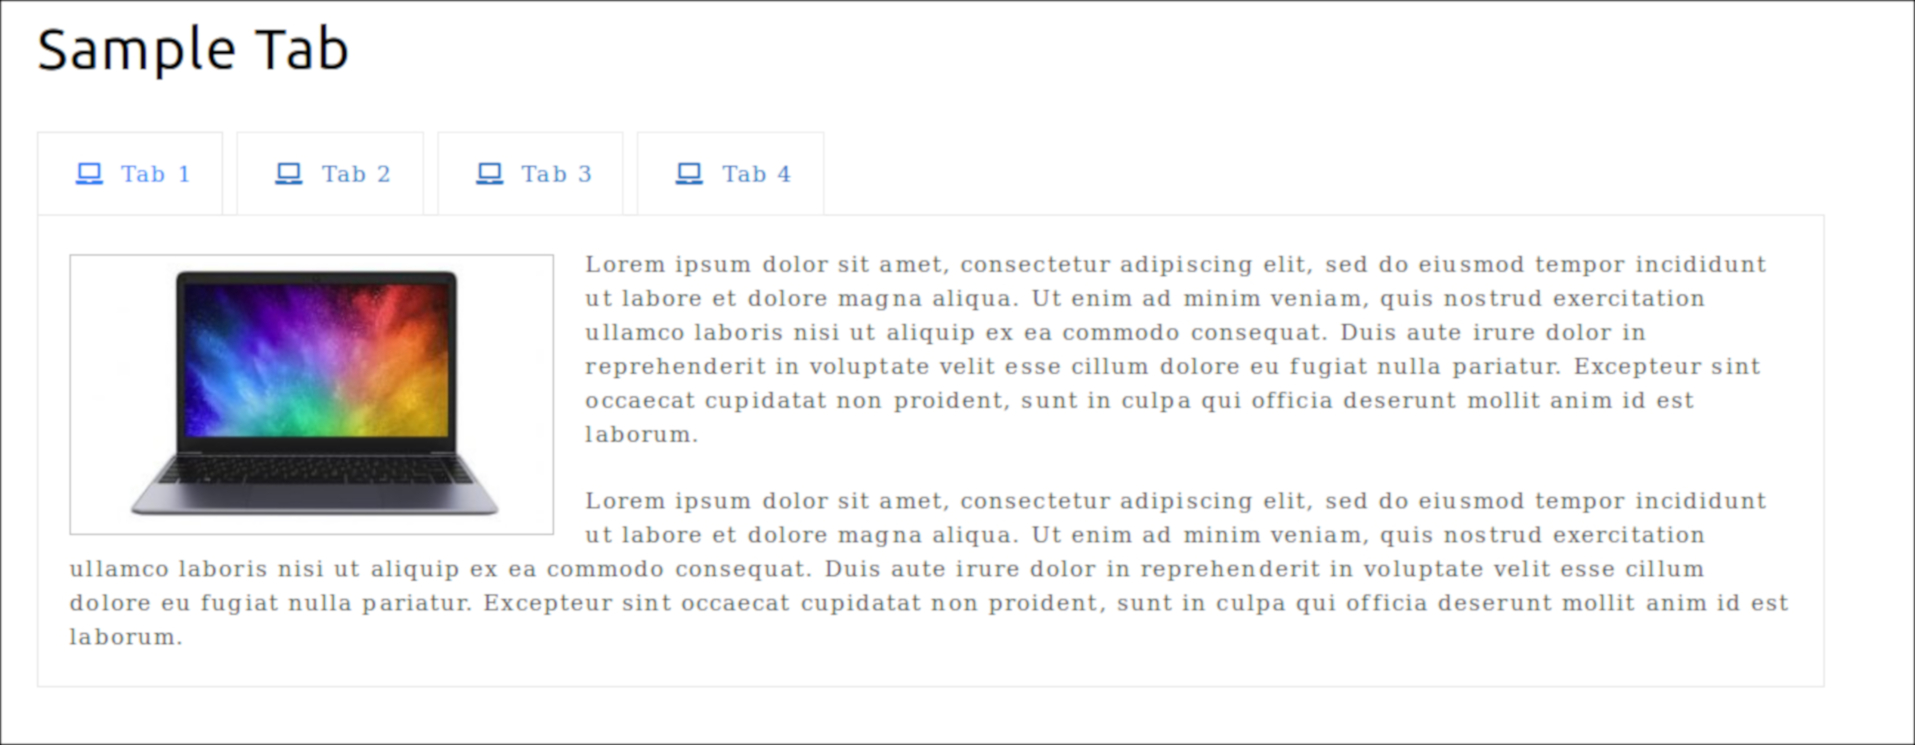
Tabs are used quite often, especially in eCommerce. When you see a site that separates information about a product on the same page, those are usually tabs.
Today I’m going to show you how to add content tabs in WordPress.
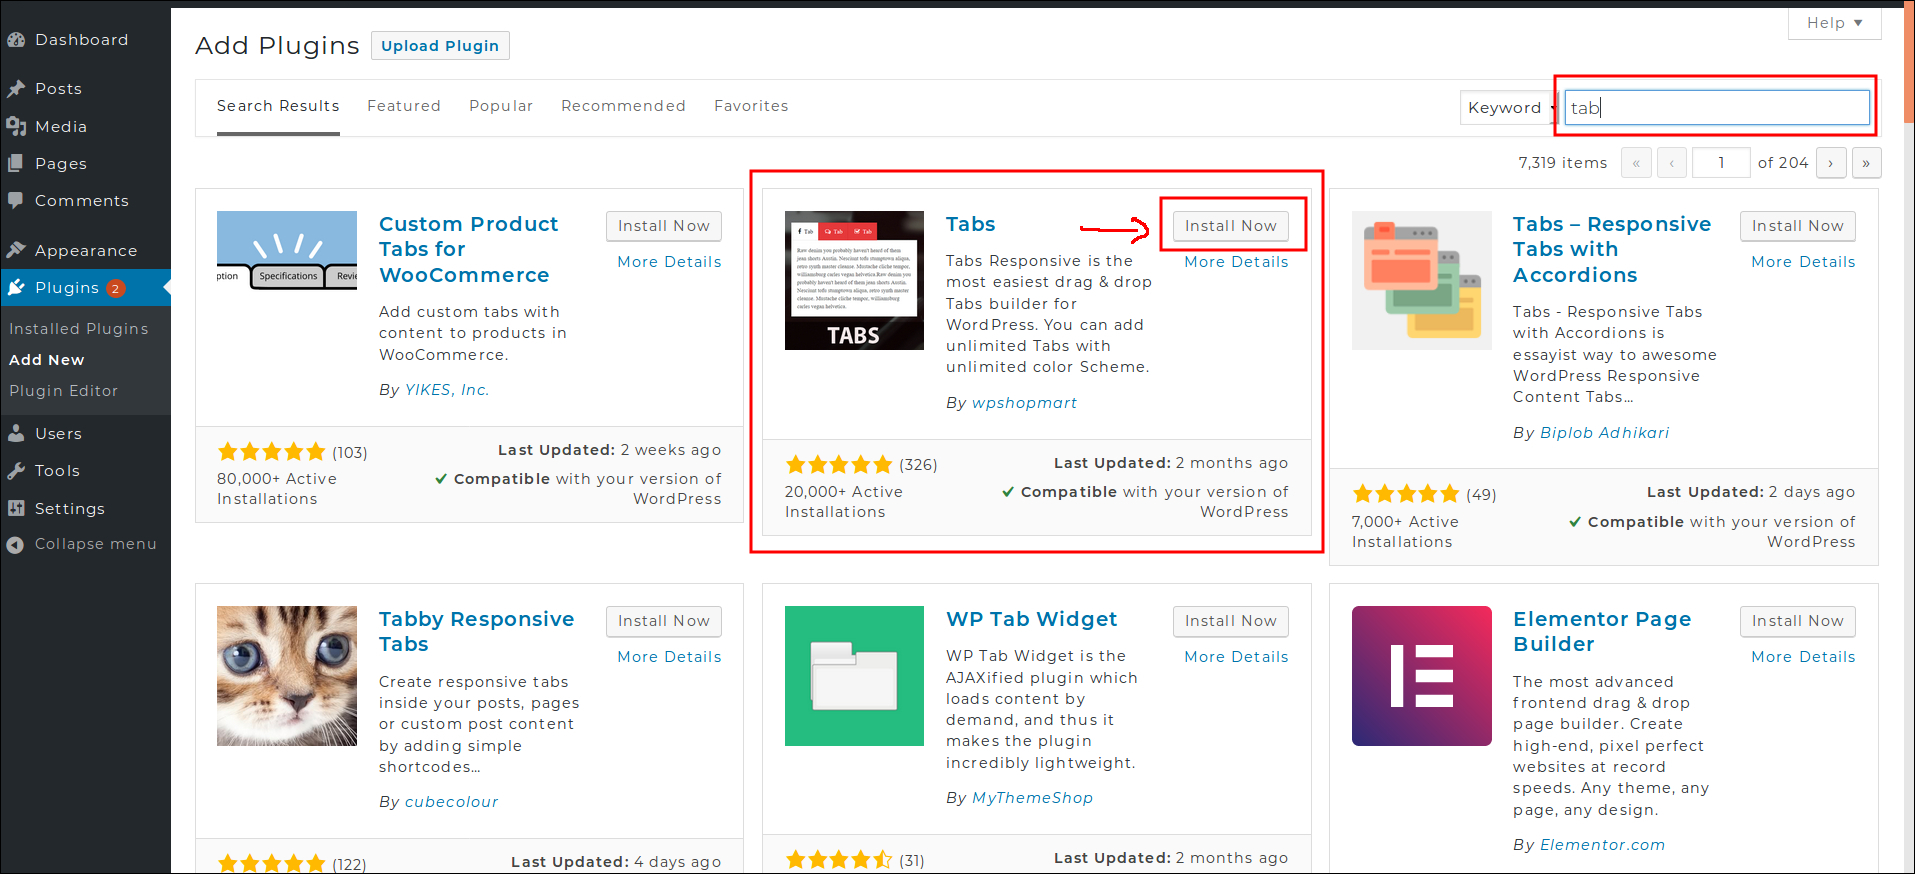
Login to your WordPress admin dashboard and navigate to Plugins > Add New then search for ‘Tab’. Find ‘Tabs’ (screenshot below) then click Install Now.
After installed go to admin dashboard and click the new tool, “Tabs Responsive” This will open a section that will let you customize how your tabs appear on the site. (screenshot below)

As you can see from the below image, you get a good set of options for adding the tabbed area to your page or posts. The options include setting the number of tabs, their alignment, and picking the colours of the tabs etc.
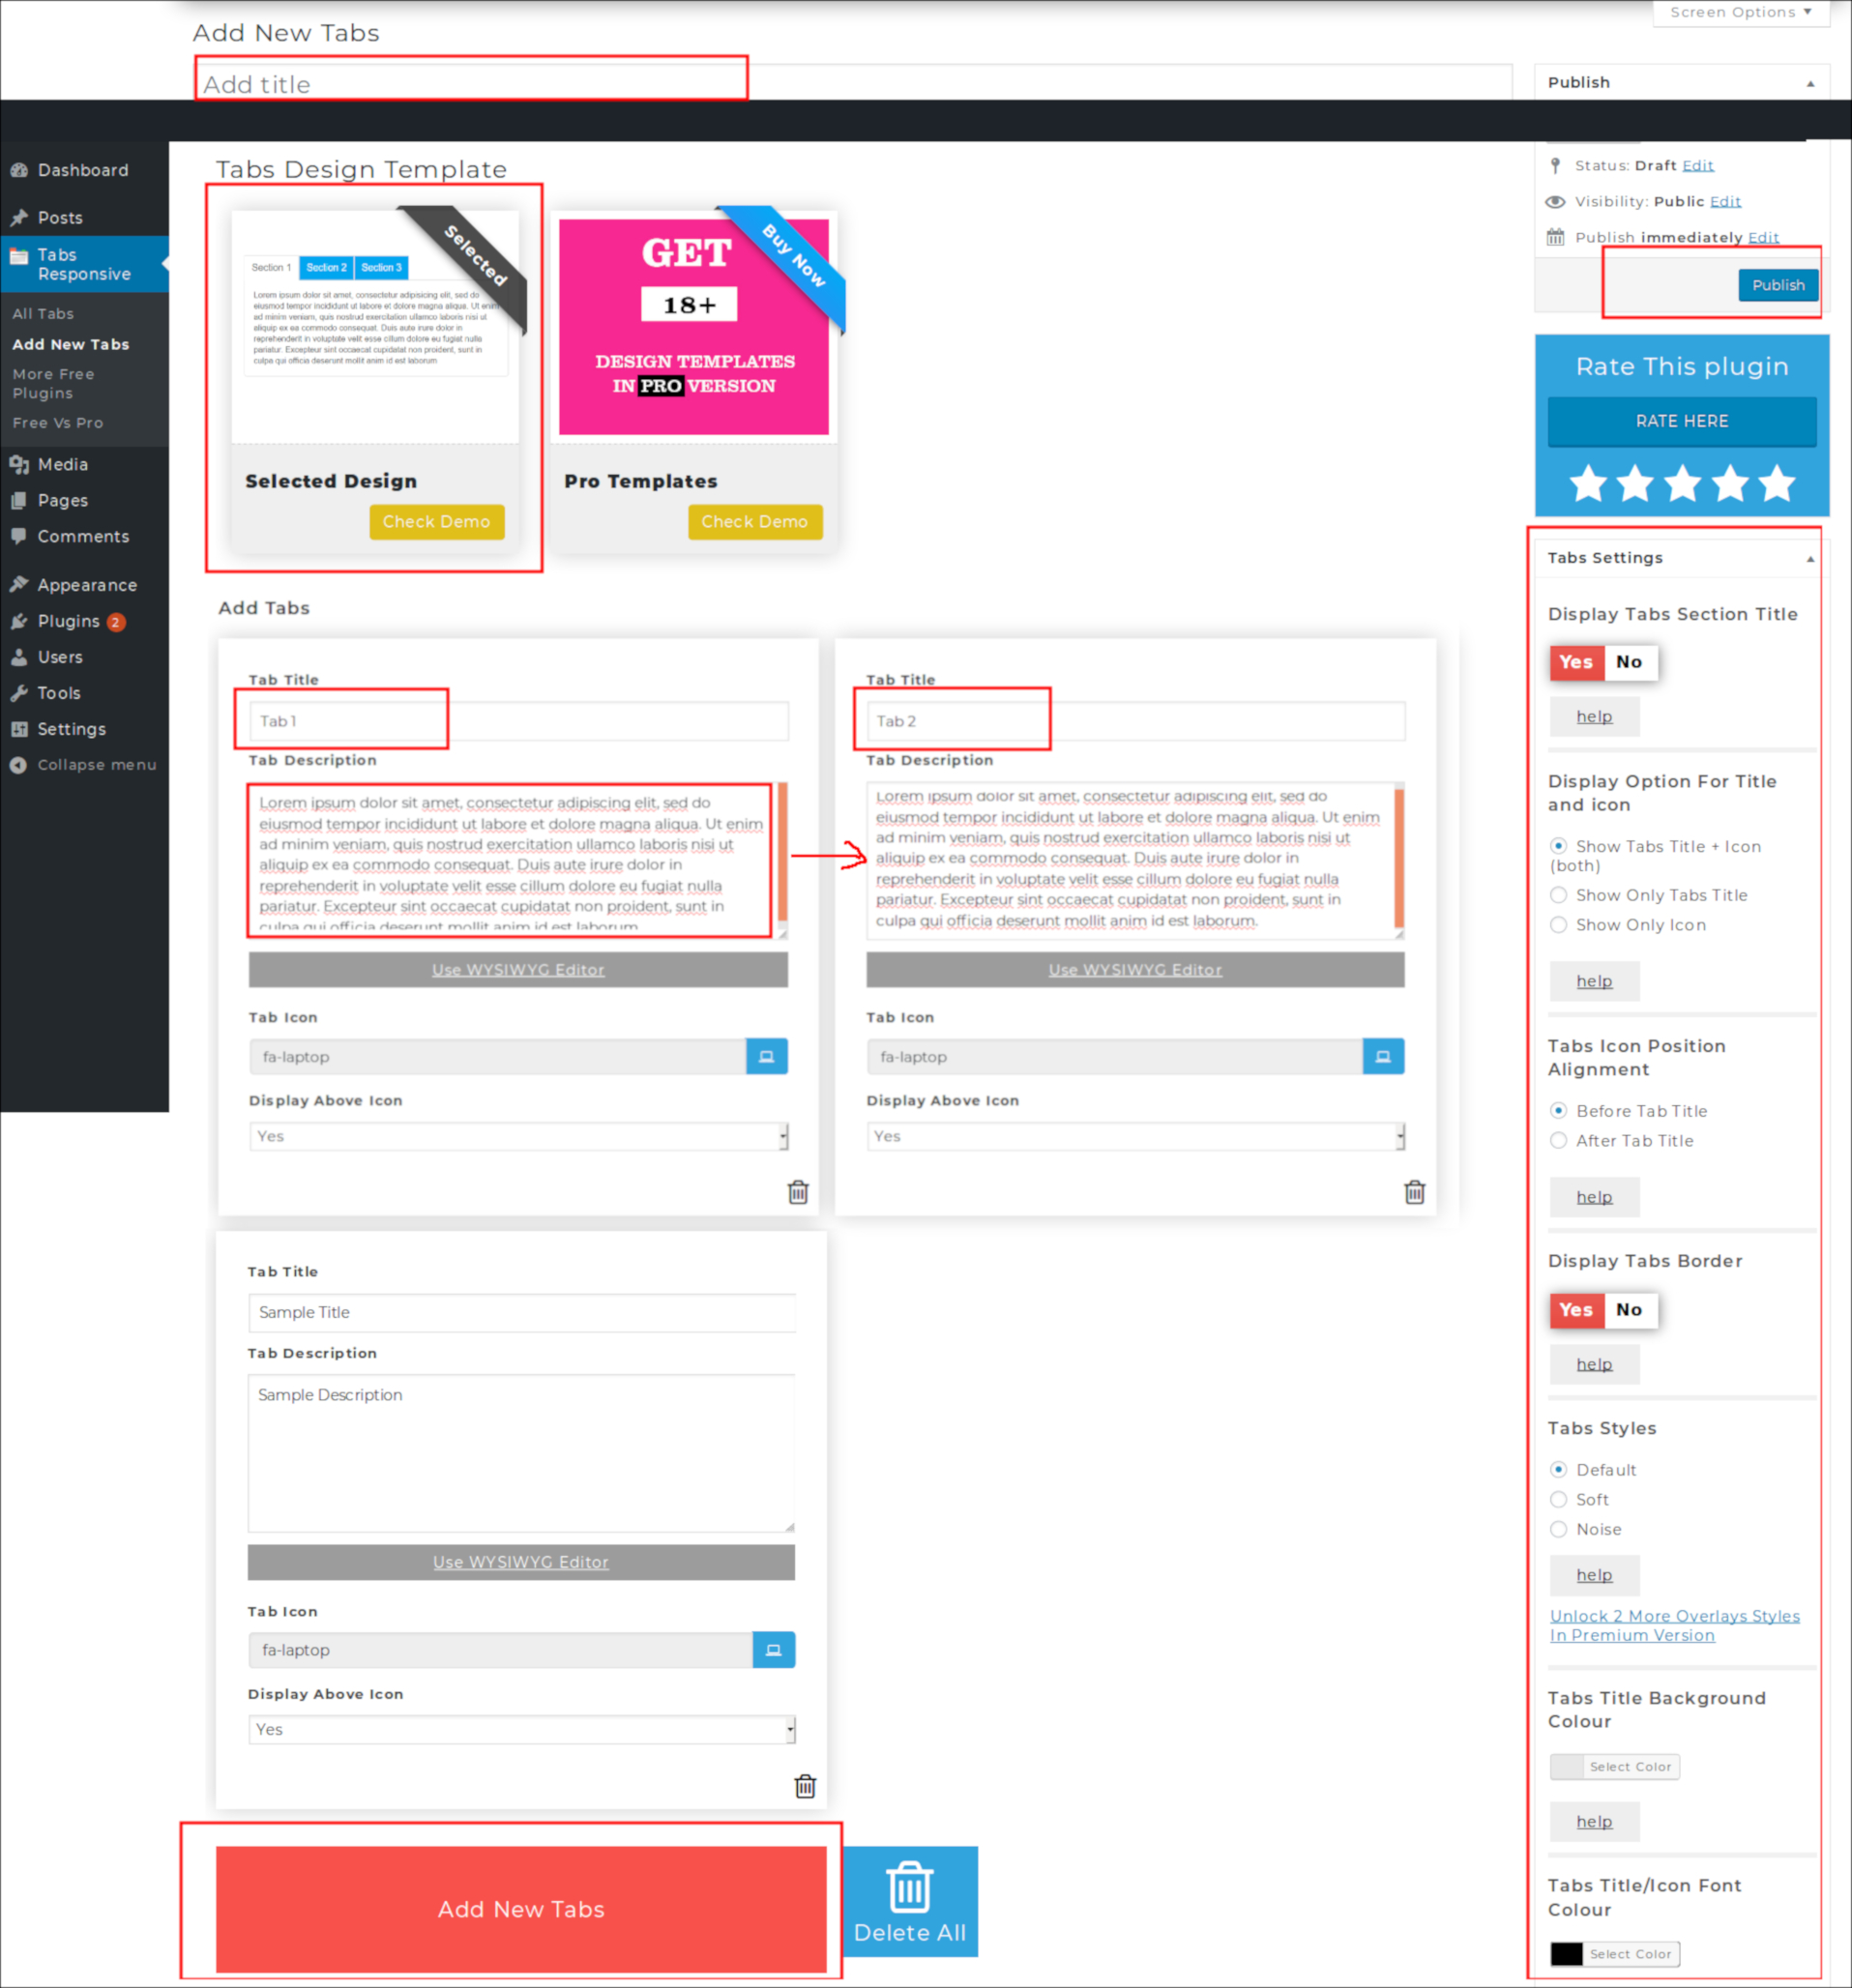
Once you’ve customised the tabs, the plugin will insert the shortcode into your post or page editor which when clicked allows you to insert the shortcode into your post or page, with the layout you want.
(screenshot below)

If you want to insert images in to your tab content.? You can use WYSIWYG Editor this will show bottom of the tab section. (screenshot below)
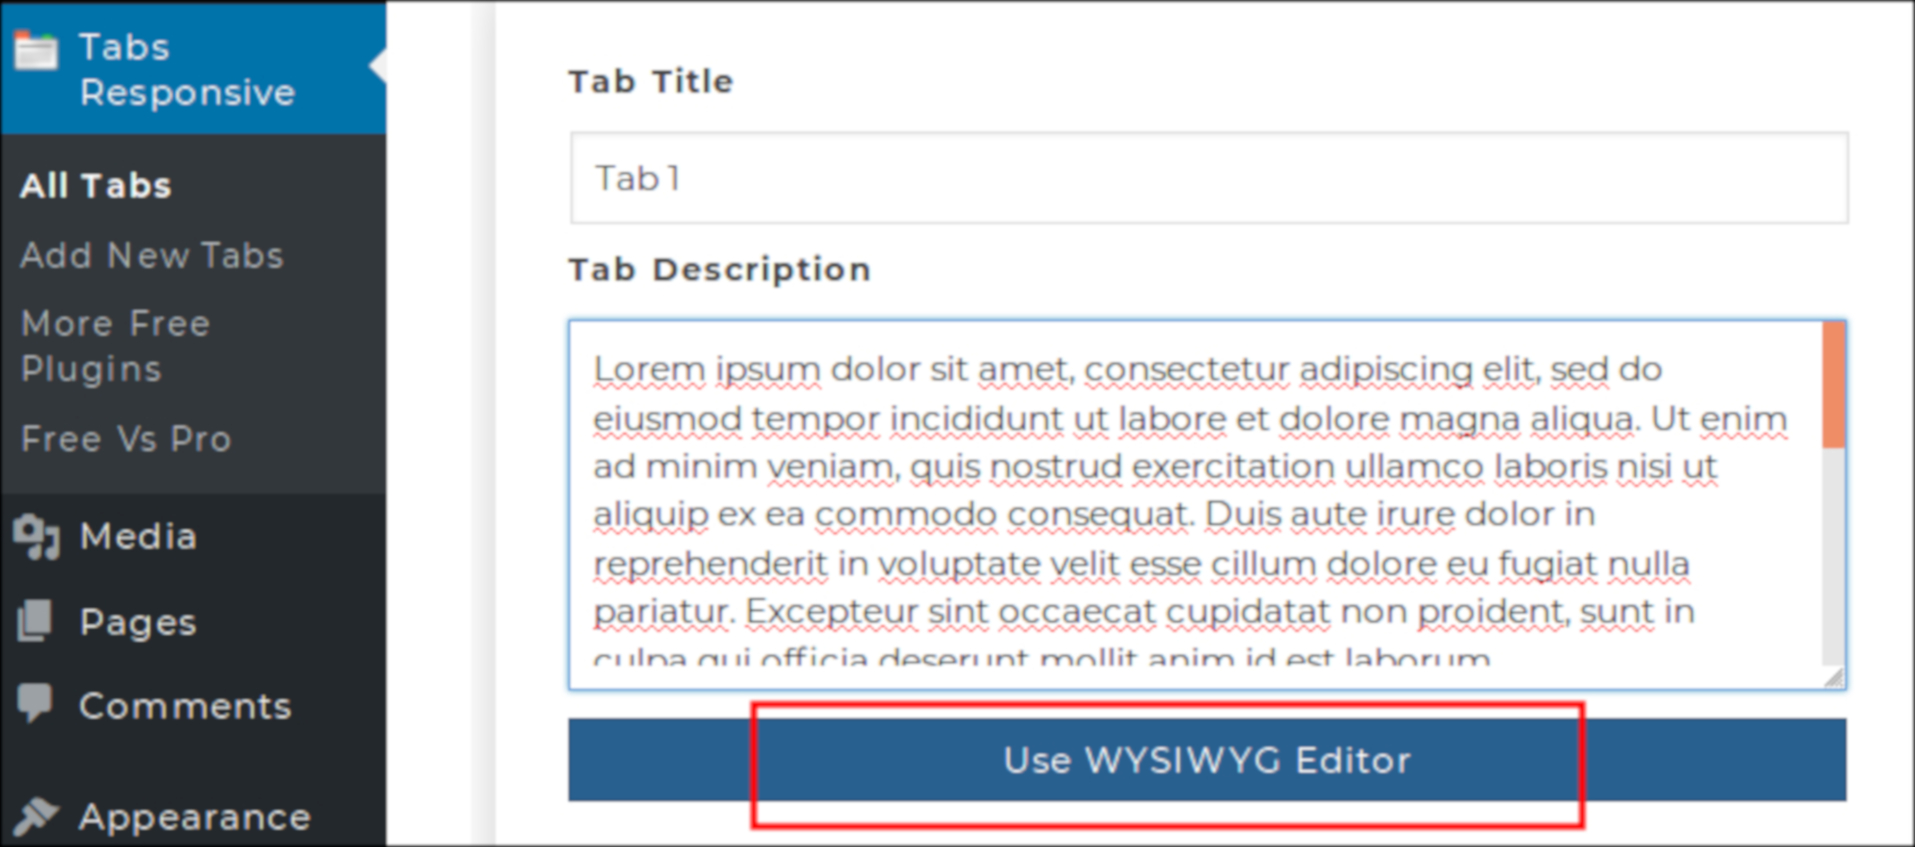
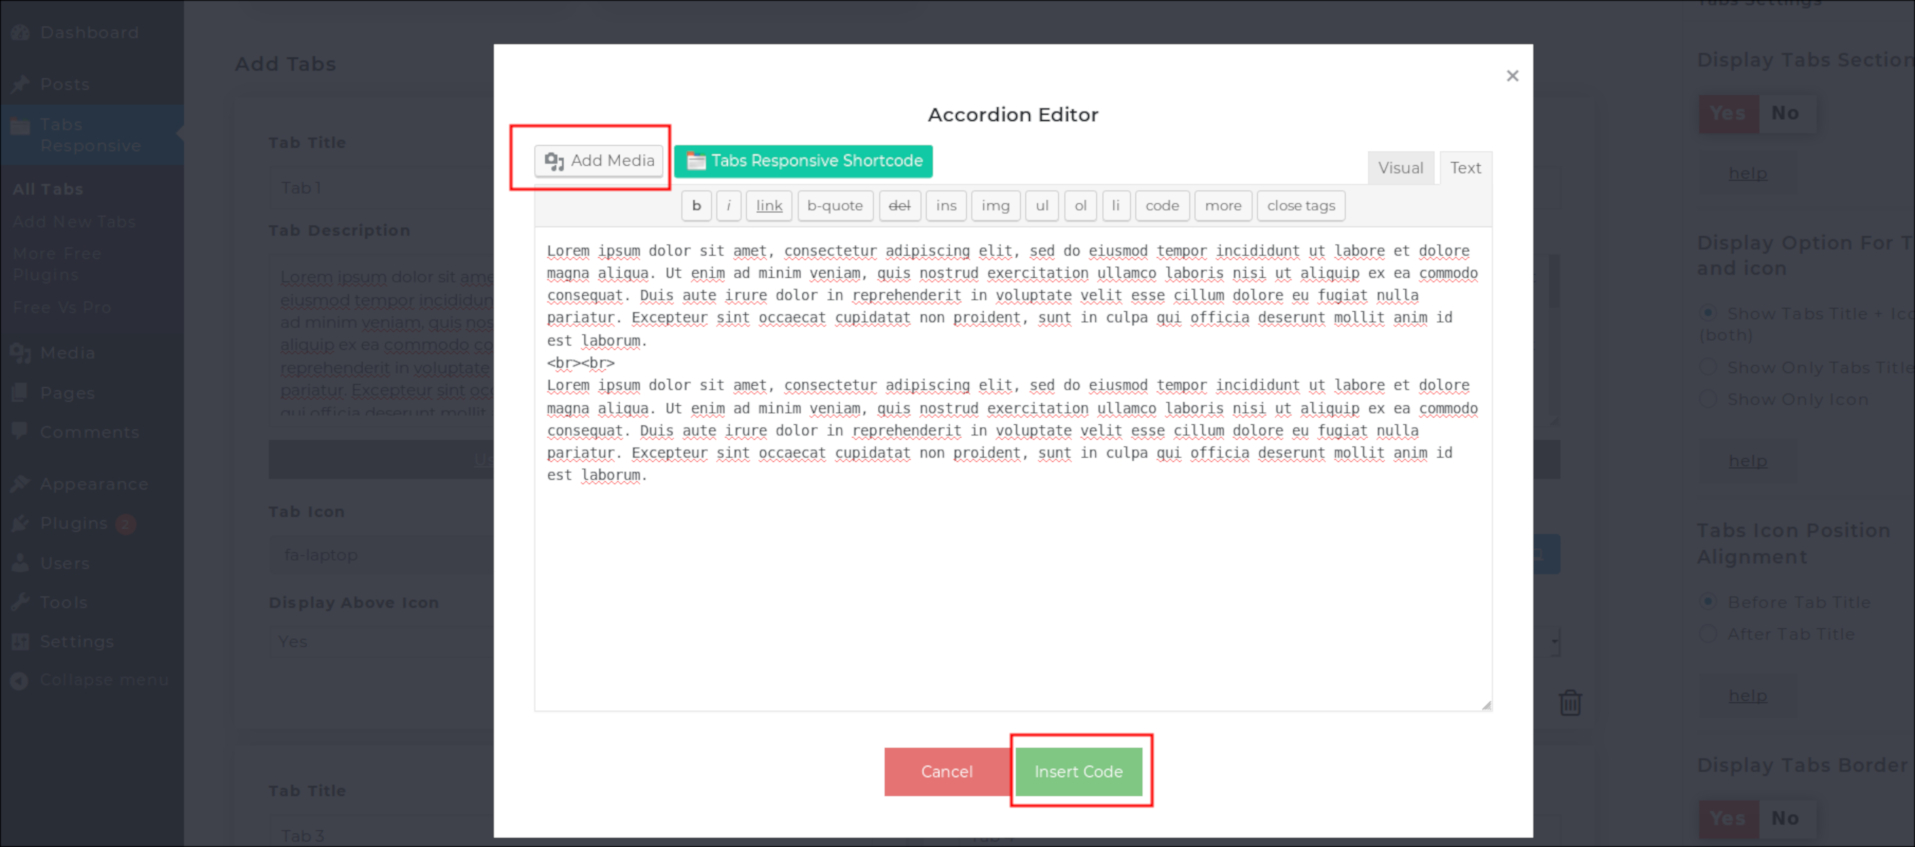
Now click on ‘WYSIWYG Editor‘ tab, then a popup will appear. Click on ‘Add Media‘ button, then select your images you wnant and insert it. Again Click on ‘Insert Code‘ button so the code will be pasted in your Tab section.
Then it’s just a case of entering the content and hitting the preview button to see how your post will look to your visitors.
