In this tutorial I am going to share with you how to add tables in WordPress posts or pages.
There are a lot of fun things that need to be done when posts or pages in WordPress. But no WordPress site has a table button.
So how to add table in a post or page?
Login to your WordPress admin dashboard and navigate to Plugins > Add New then search for ‘TablePress’. Find ‘TablePress’ (screenshot below) then click Install and Activate it.

After installing plugin, activate it by clicking “Activate” button.

After activating the TablePress, you will see a top level menu that has been added to your admin dashboard.(screenshot below)

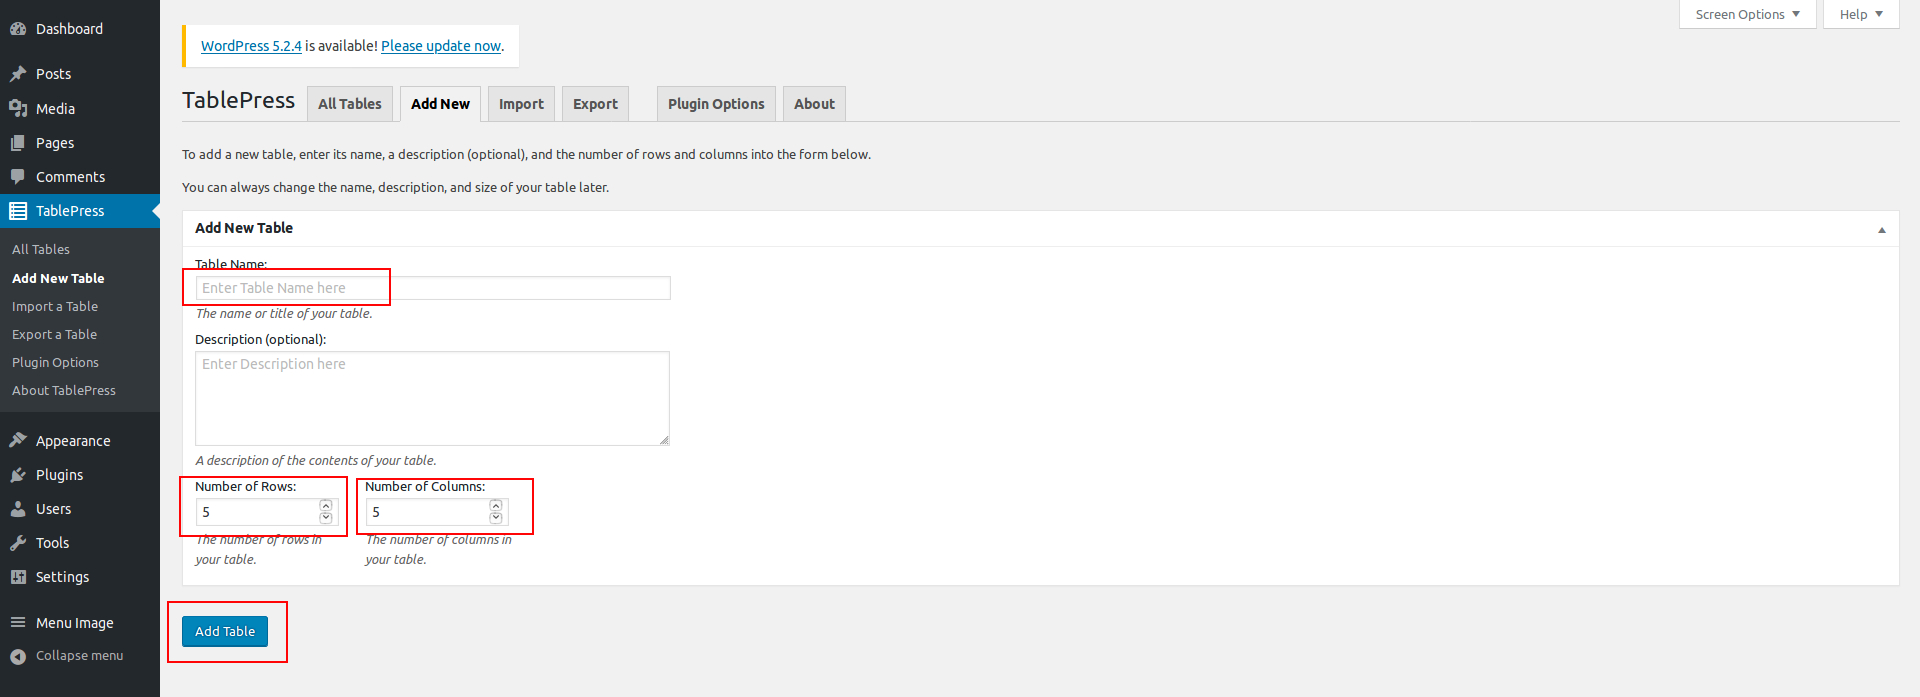
When you have clicked the Add New Table button, you will be directed to the New Table Setting Page. Here you can set the table name, description, number of rows and number of columns and click on the Add Table button. Check out the screenshot below: (Don’t worry, you can always update rows and columns later).

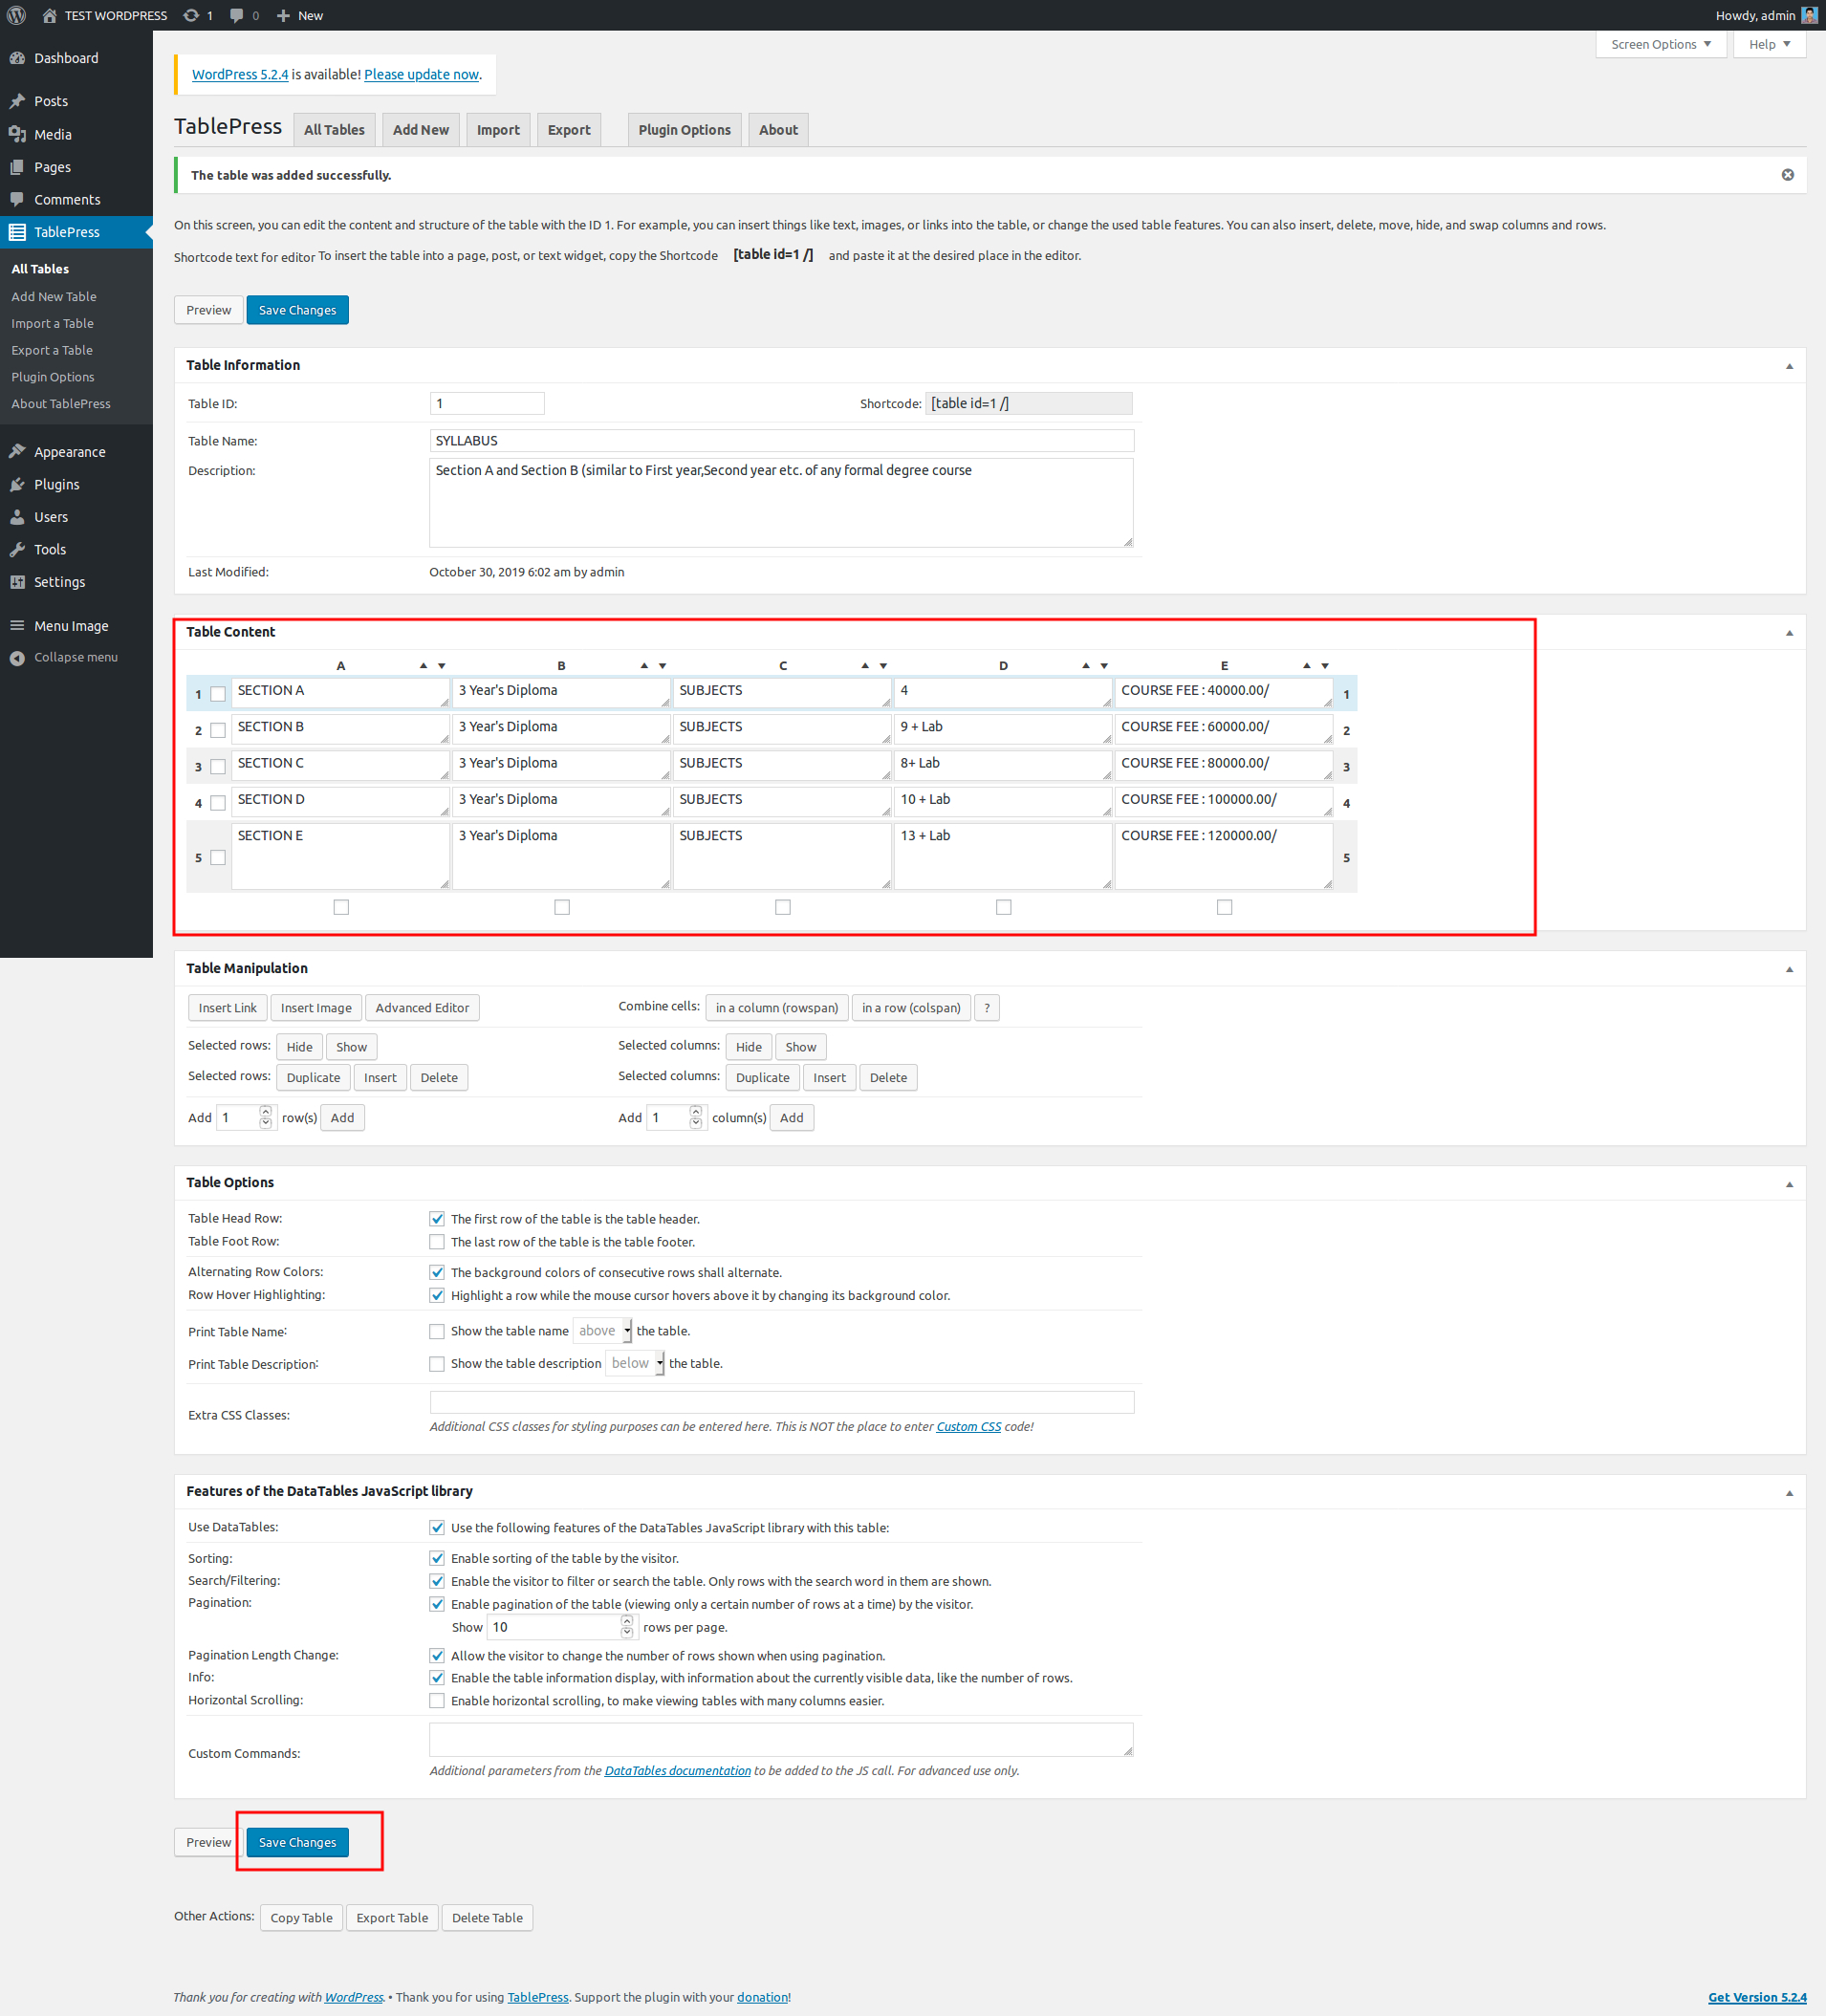
Now you can add all the information you intend to include in the table. After you enter the information click the Save changes button your table will be created. Check out the screenshot below:

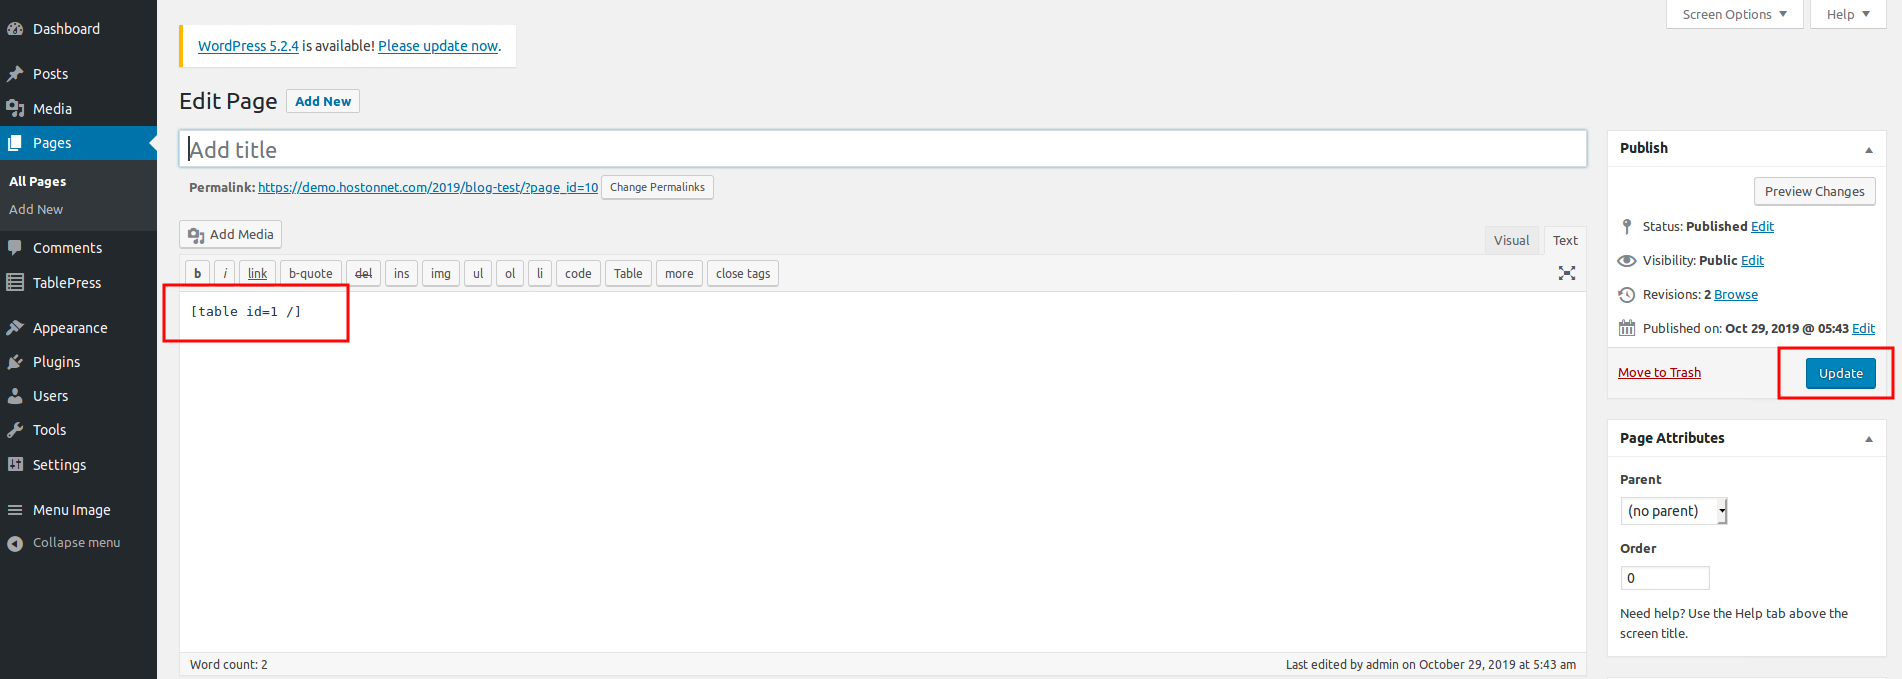
When your table is ready, copy the short code from the table page and paste it into the pages or posts using the editor.

You can view your table by looking at the view post or page after updating or publishing it.


