This tutorial assumes you’ve already logged in to your WHMCS admin panel.
Now let’s learn how to setup tax rules.
1. Go to Setup.
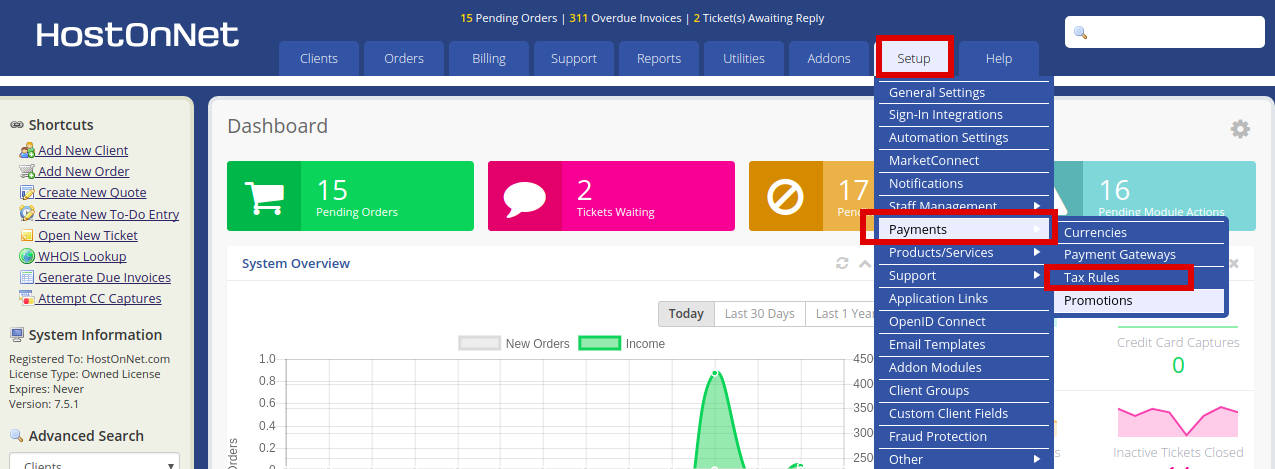
2. Mouse hover Payments.
3. Click Tax Rules.
4. By default, taxes are not enabled. Check this box to enable them.
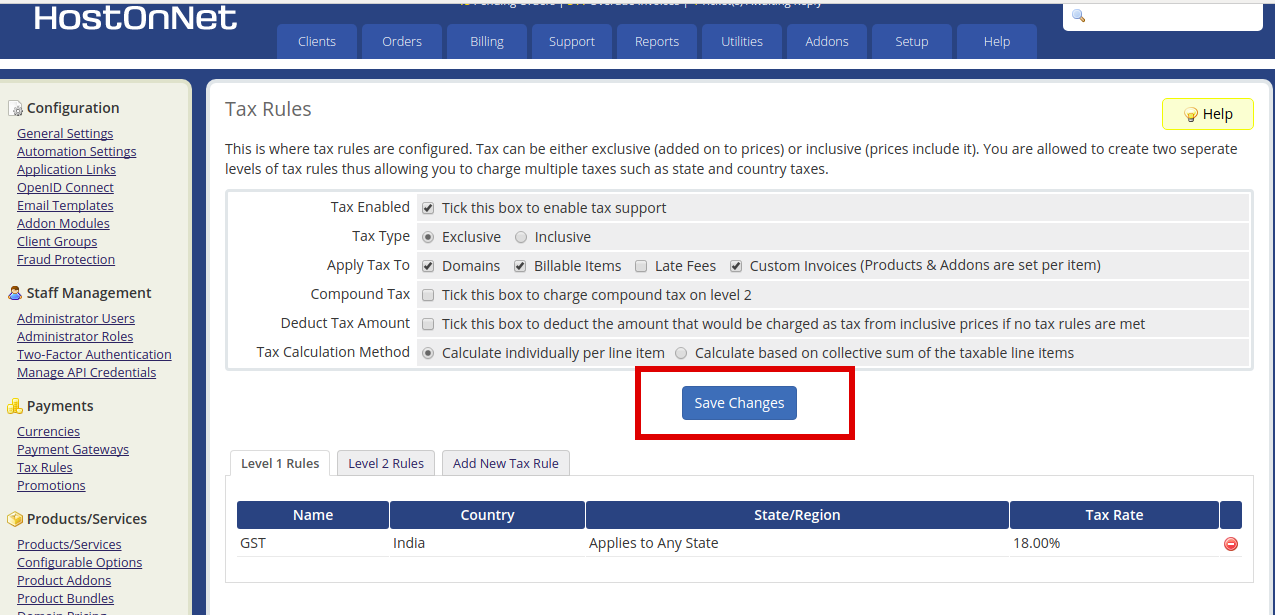
5. Select whether you want your prices to include the taxes (inclusive) or have them added on top of your prices (exclusive).
6. Using these fields, specify whether taxes should be applied to domains, custom invoices or late fees.
7. Enabling compound tax will apply the level 2 tax rates to the total after level 1 taxes have been applied instead of to the subtotal.
8. When finished, click Save Changes.
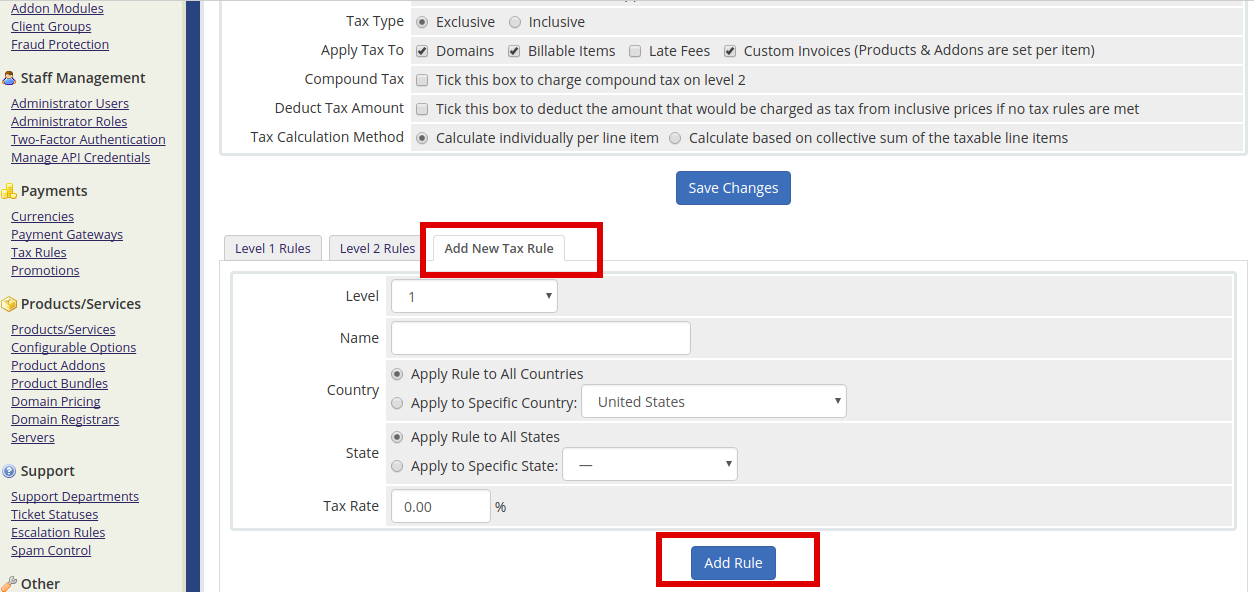
9. Click Add New Tax Rule.
10. Enter the name of your tax rule.
11. Select whether the rule is to apply to all countires, or just a specific country.
12. Next, decide whether the rule is to apply to all states, or a specific state.
13. Last, set a tax rate.
If you want to apply the rule to multiple states, you’ll need to setup a separate rule for each state.
14. To finish, click Add Rules.
Now the tax rule has been setup successfully.
