phpMyAdmin uses PHP and Apache to manage databases. It’s the most popular database management tool. To install and use it in Ubuntu, run the commands below. It requires Apache as well as PHP so make sure those packages are installed.
sudo apt-get install phpmyadmin
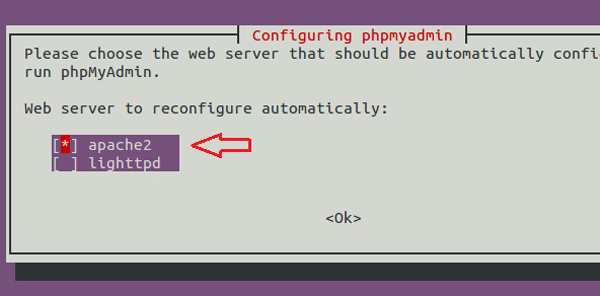
When prompted to select the webserver to use, choose apache2 to continue. The spacebar will select it and press the tab key to skip to Ok and press Enter.
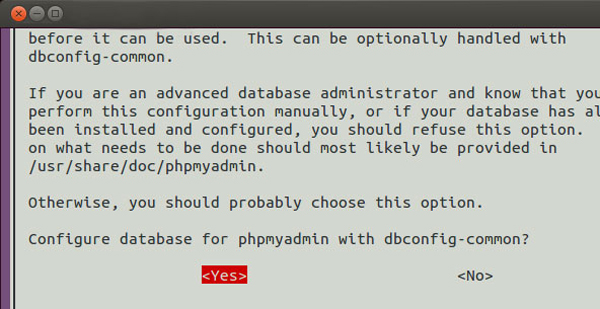
Next, choose Yes if you’re prompted with the screen below. this allows for the creation of phpmyadmin user database.
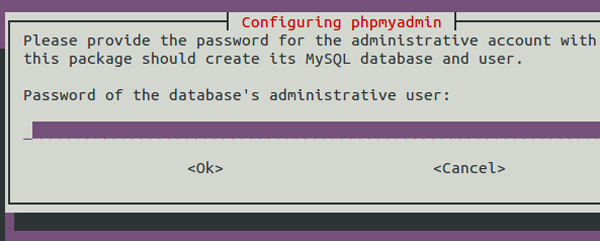
When prompted for password, type the root password for your MySQL database. Select Ok to continue.
On the next screen, you’ll also be prompted to create a new password for phpmyadmin user. Create and confirm it to continue. When you’re done, open your web browser and type the URL below to get to phpMyAdmin logon page.
http://localhost/phpmyadmin
To sign in, use the root username and password for the database server.
