Today we can check how to add header background image for each page in WordPress using Advanced Custom Fields plugin.
After the installation and activation of Advanced Custom Fields plugin, go to Custom Fields > Add New
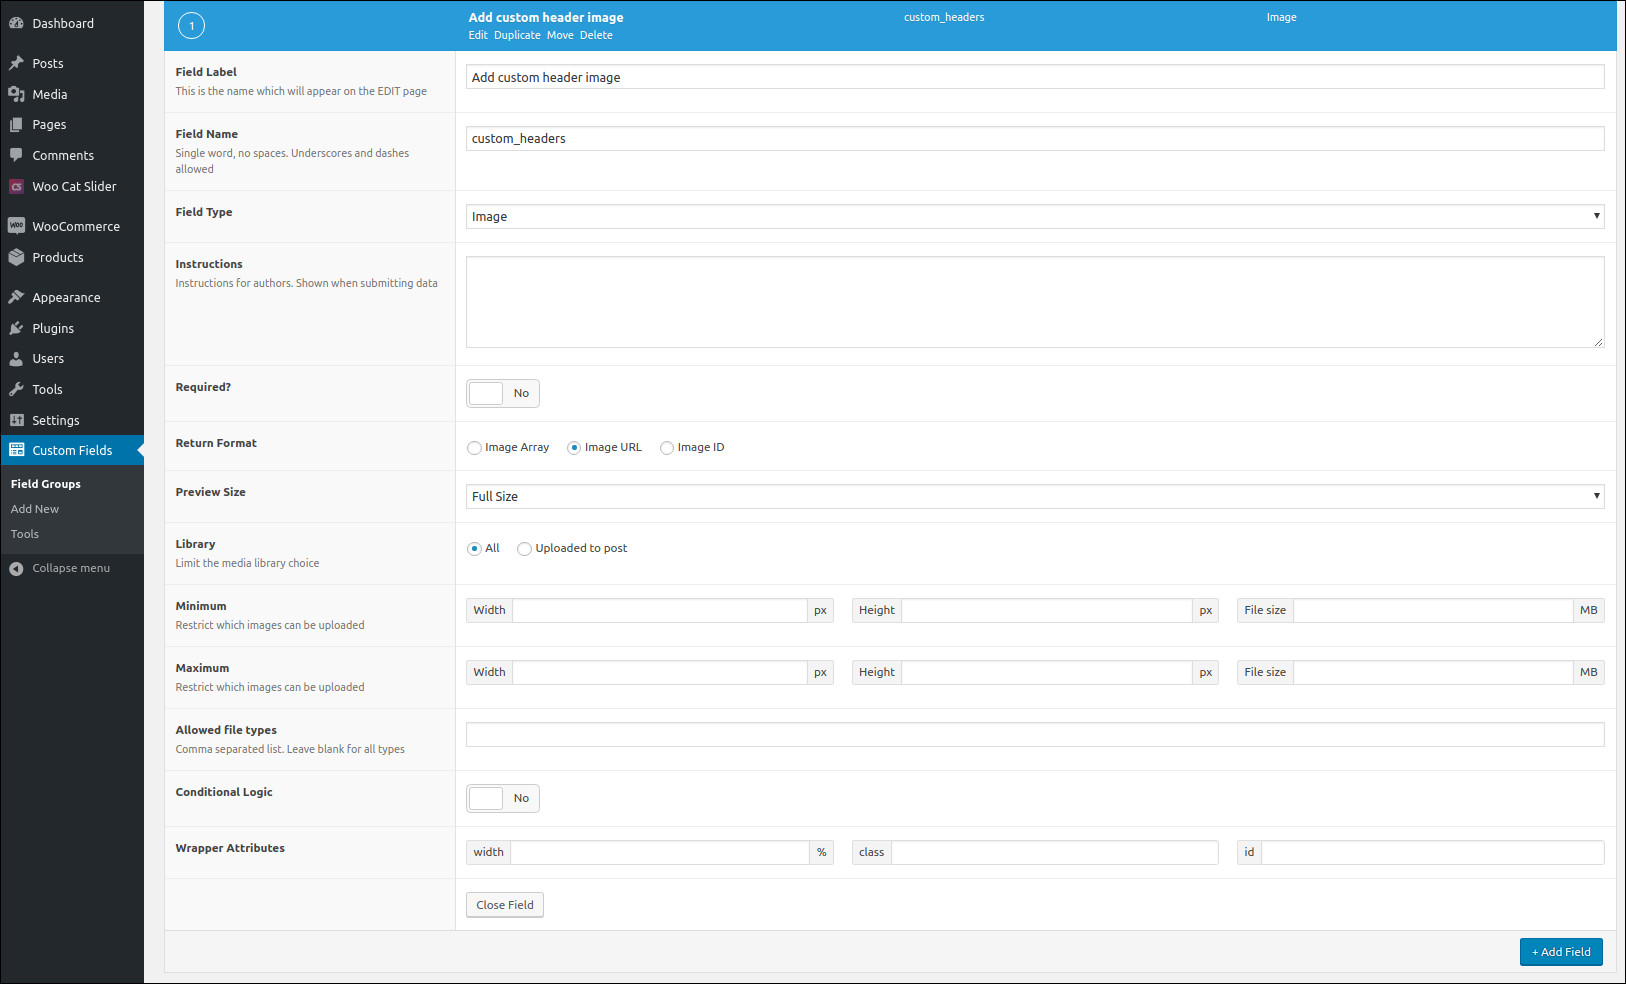
Add your tile and then click Add Field button and add like below
| Field Label: | Add custom header image |
| Field Name | custom_headers |
| Field Type | Image |
| Preview Size | Full size |
Adding a field will look like this:

The location box allows you to create a set of rules which decide when and where to add these fields to the edit screen / post object.
I set the rule like Post Type – is equel to – Top Level Page

Edit header.php in your theme folder and find the below code
<div id="content" class="site-content">
(Its depend on the theme. If you need full-width header background, you have to place the code in outside of the main container)
Add this code at the top of given code
<div class="custom-header" style="background-image:url('<?php the_field('custom_headers'); ?>') "> <?php the_title('<h1 class="entry-title">', '</h1>'); ?></div>
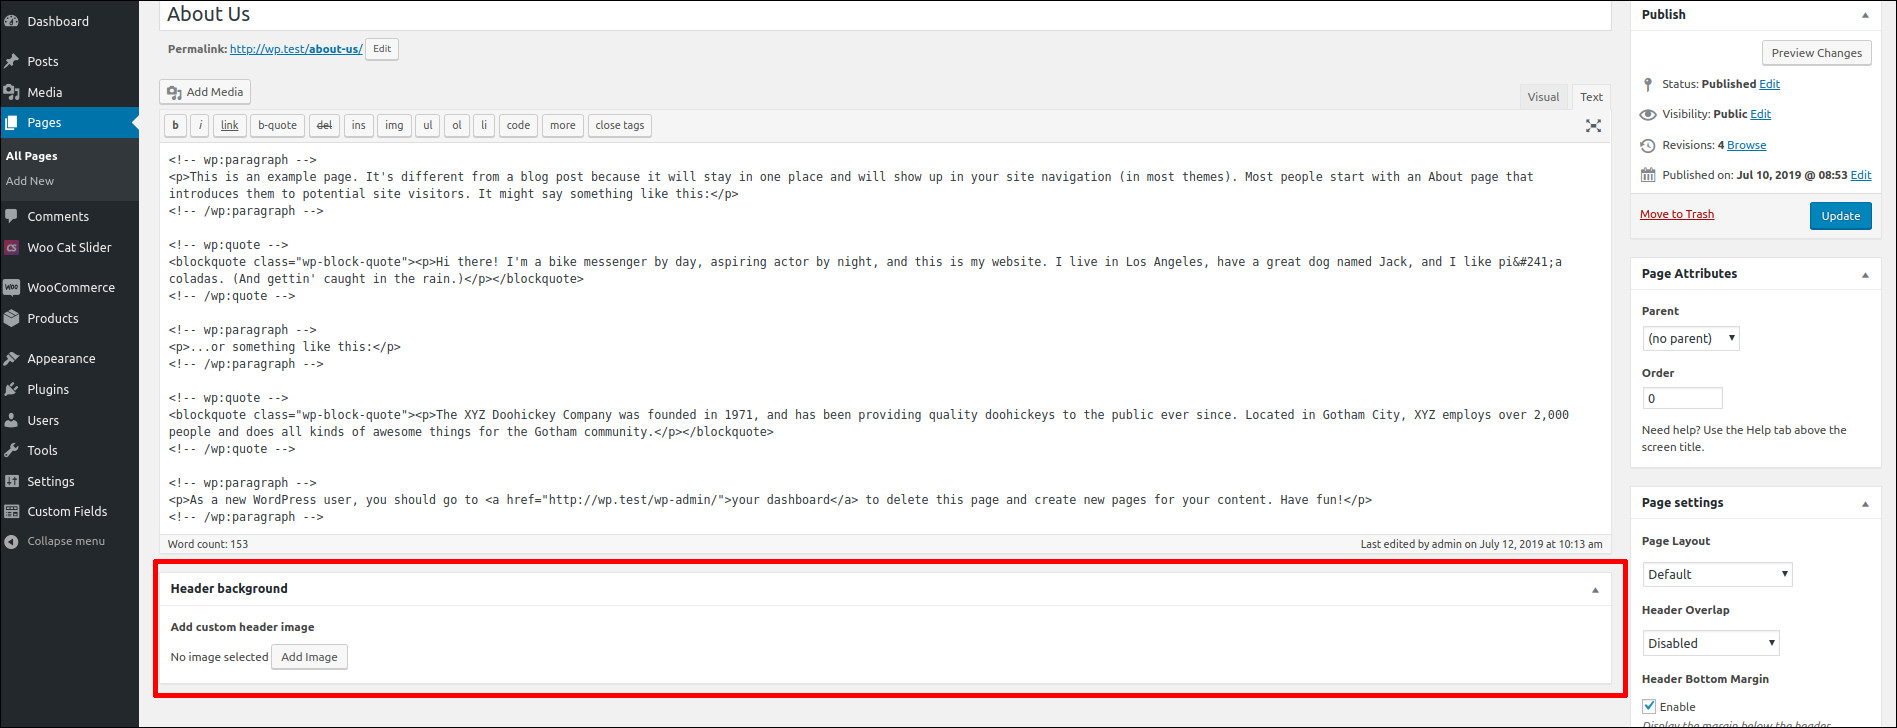
Go to admin area and add or edit your page. On the bottom of the screen, you can see Add custom header image.

Upload your image and then update/publish button
Go to Admin > Appearence > Custamize > Additional CSS and add the following css
.custom-header{
    width:100%;
    background-size: cover;
    height: 300px;
    line-height: 100px;
    margin:0px 0px 40px;
    text-align: center
}
.custom-header img{
    width:100%;
}
.custom-header h1{
    line-height: 300px;
    padding:0px 10px;
    color: #fff
}
Below is an example result


