This tutorial will help you to install Piwigo Photo Gallery Script on your domain.
A web hosting space with PHP and MySQL version 5 or above is enough to install this. You can check the server requirements here.
First download the full archive from here. The .zip file is only above 6 MB when compressed and becomes above 18 MB when extracts.
Once download completed, unzip the same and transfer the archive content to your web server with any FTP client. Piwigo recommends FileZilla as a FTP Client, because its completely free and compatible with both Windows and Linux. Upload tutorial is available here.
You can install Piwigo at the website root, inside any folders called “photos” , “gallery” etc. directory is not mandatory. Whatever directory name you choose, it is recommended to avoid showing Piwigo release number (piwigo-2.0.0).
Next step is Configuration.
Once all files are transferred to your server, go to the web address with a web browser, for example http://yourdomainname.com/photos/, Piwigo will check and if nothing is installed yet, it will redirect you to the installation page.
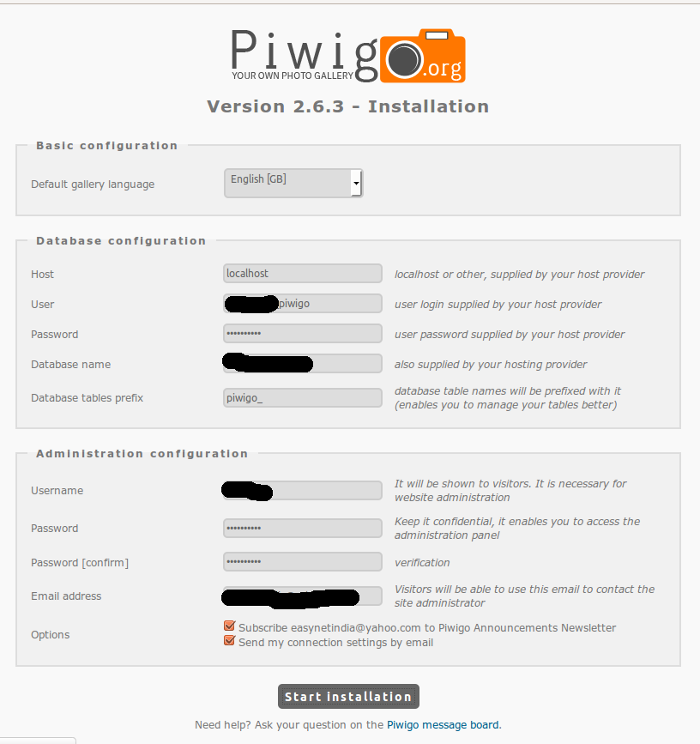
Select the language first. Next thing is about database configuration. In that page you need to provide the MySQL database informations. This can be created by login to your web hosting control panel provided by your hosting service provider.
Fill in the MySQL database connection settings, as given by your web hosting provider:
-
Host
User
Password
Database name
A prefix** for Piwigo table names
Administrative configuration requires the following things:
-
An account username for managing the piwigo script.
A password you have to enter twice, for checking.
Your email address, so that visitors can contact you
After filling all these files, click on “Start Installation” button.
Next page will show you whether the installation is success or not.

If the installation is finished successfully, you can go into your gallery. Login with your webmaster account, and you can reach the administration panel.
NOTE: The NetInstall simplifies the download/extract/transfer steps, as you have a single file to take care of.
