Log in to the your cPanel.
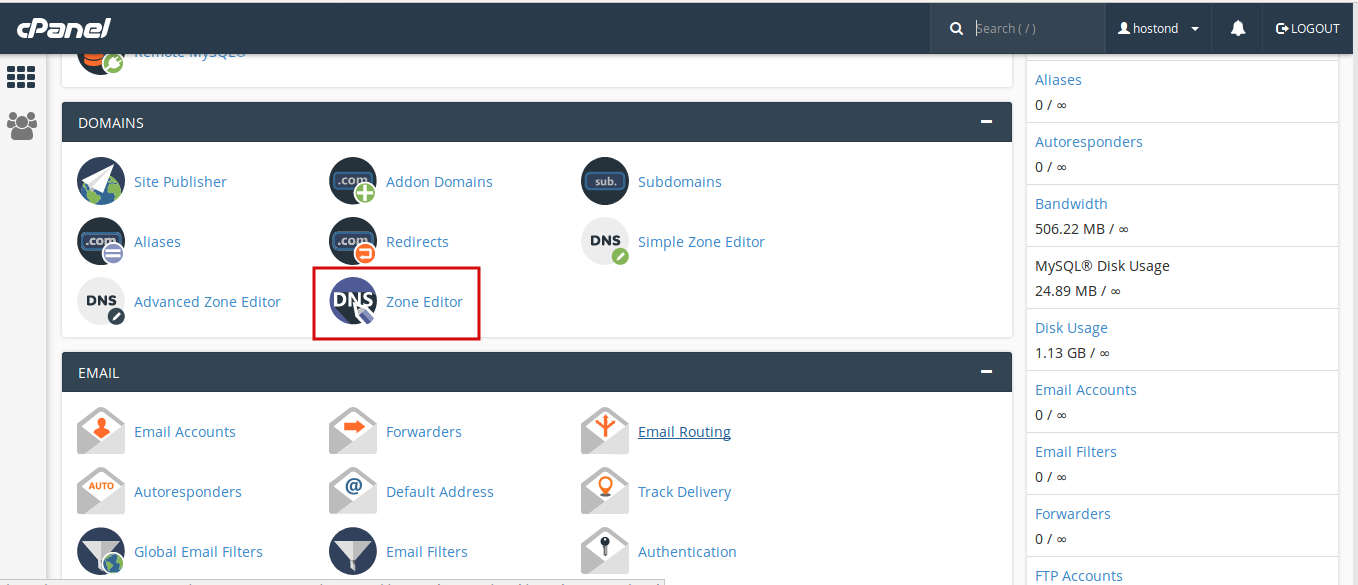
In the “Domains” section, click on the “Zone Editor” Icon.
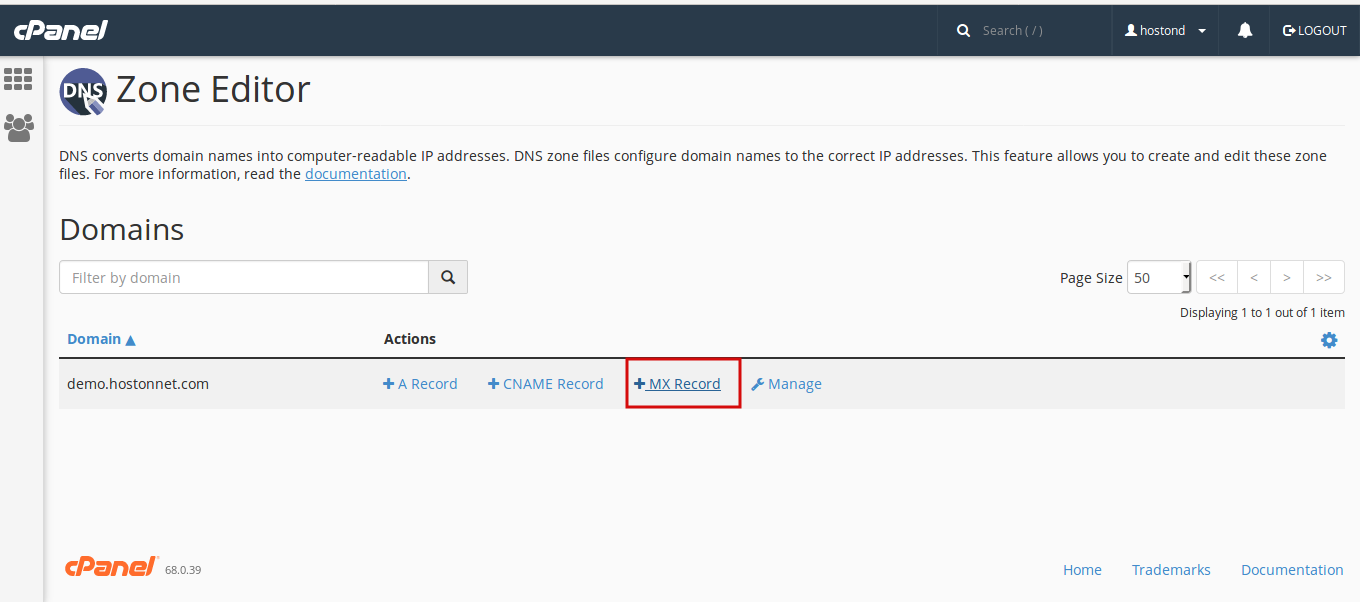
Select the domain where you need to change the MX records and then click on +MX Record.
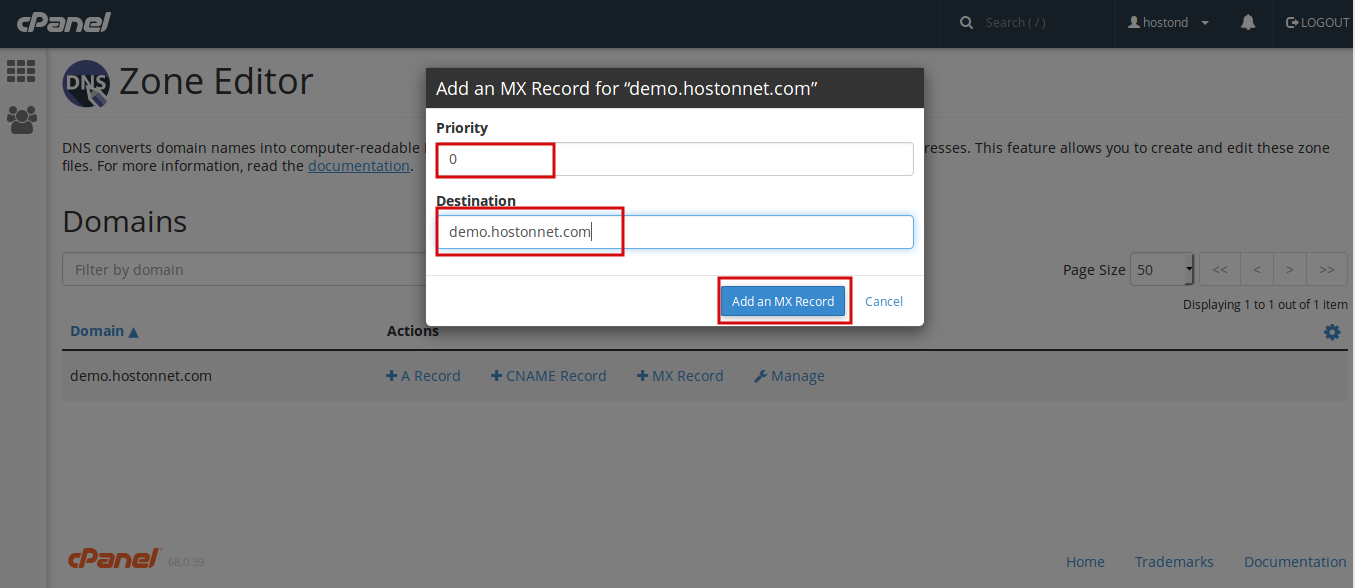
Enter the Priority and Destination settings into the corresponding fields.
Priority: The MX record you use for mail routing should have the lowest preference number, typically 0. You can use 0 for your mail routing record, and 10 for the record validating that you own your domain.
Destination: Enter the domain name of your Mail Exchange. If you use an external mail server, enter the domain name of the external mail server. Alternatively, if you use a local mail server, enter your local domain.
Click on Add an MX Record.