This tutorial will show you how to create an Email Filter in Webmail. This is userful for cPanel Hosting Clients who uses Webmail. Email filters allow you to perform a specific task such as sending a particular emails with specific subject to a specific folder, or automatically deleting email from a specific sender. Filters can really help you organize your emails by moving them to corresponding folders, un-cluttering your Inbox.
To enable ‘Email Filter‘, login to your Webmail interface.
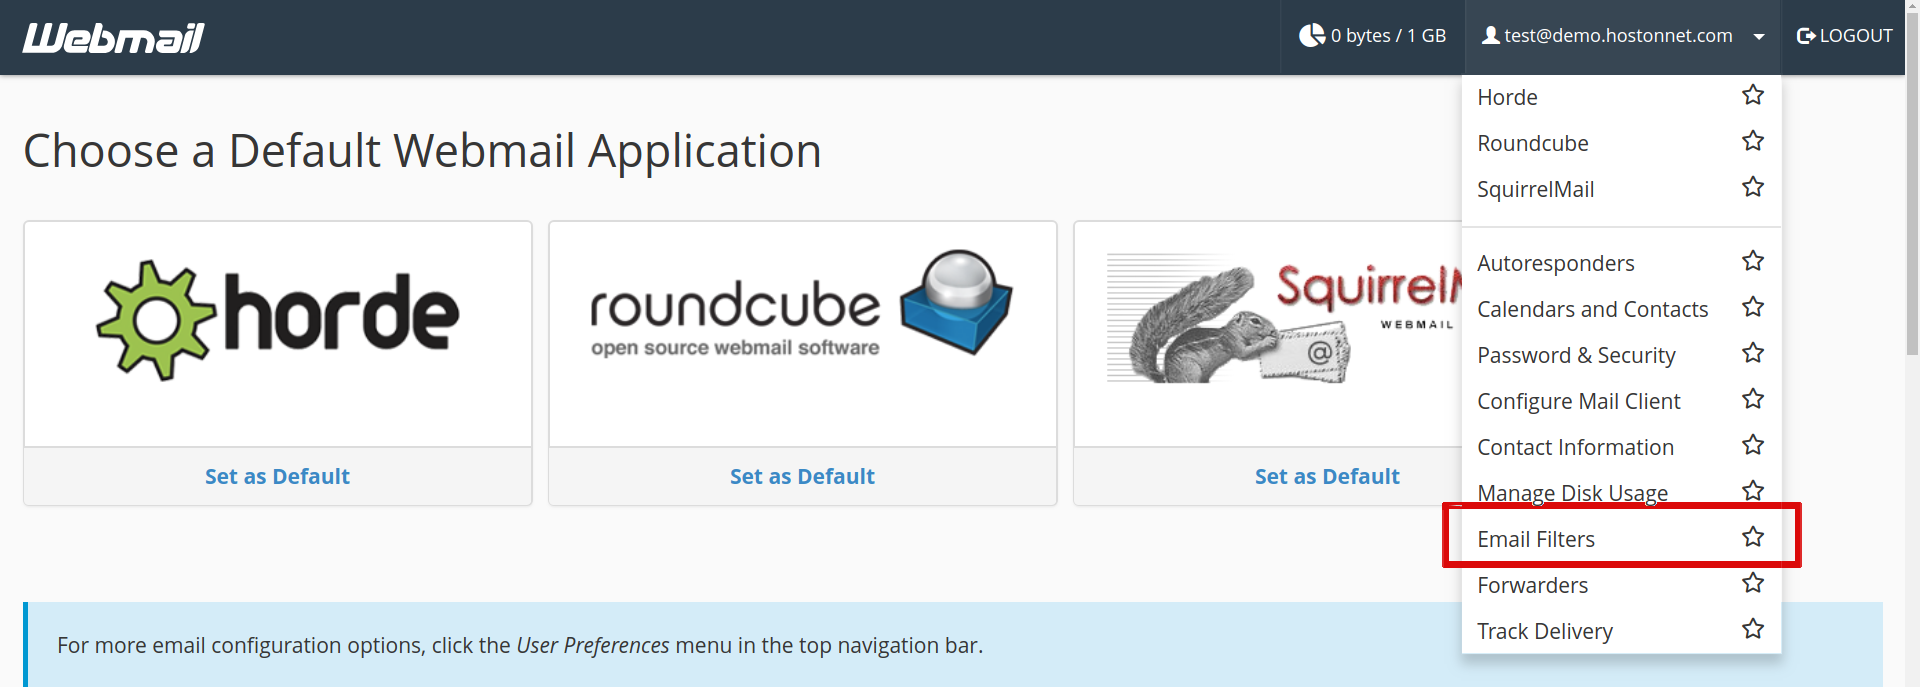
There is a drop down menu located at the right hand corner of your Webmail. Click on it and choose ‘Email Filters’.

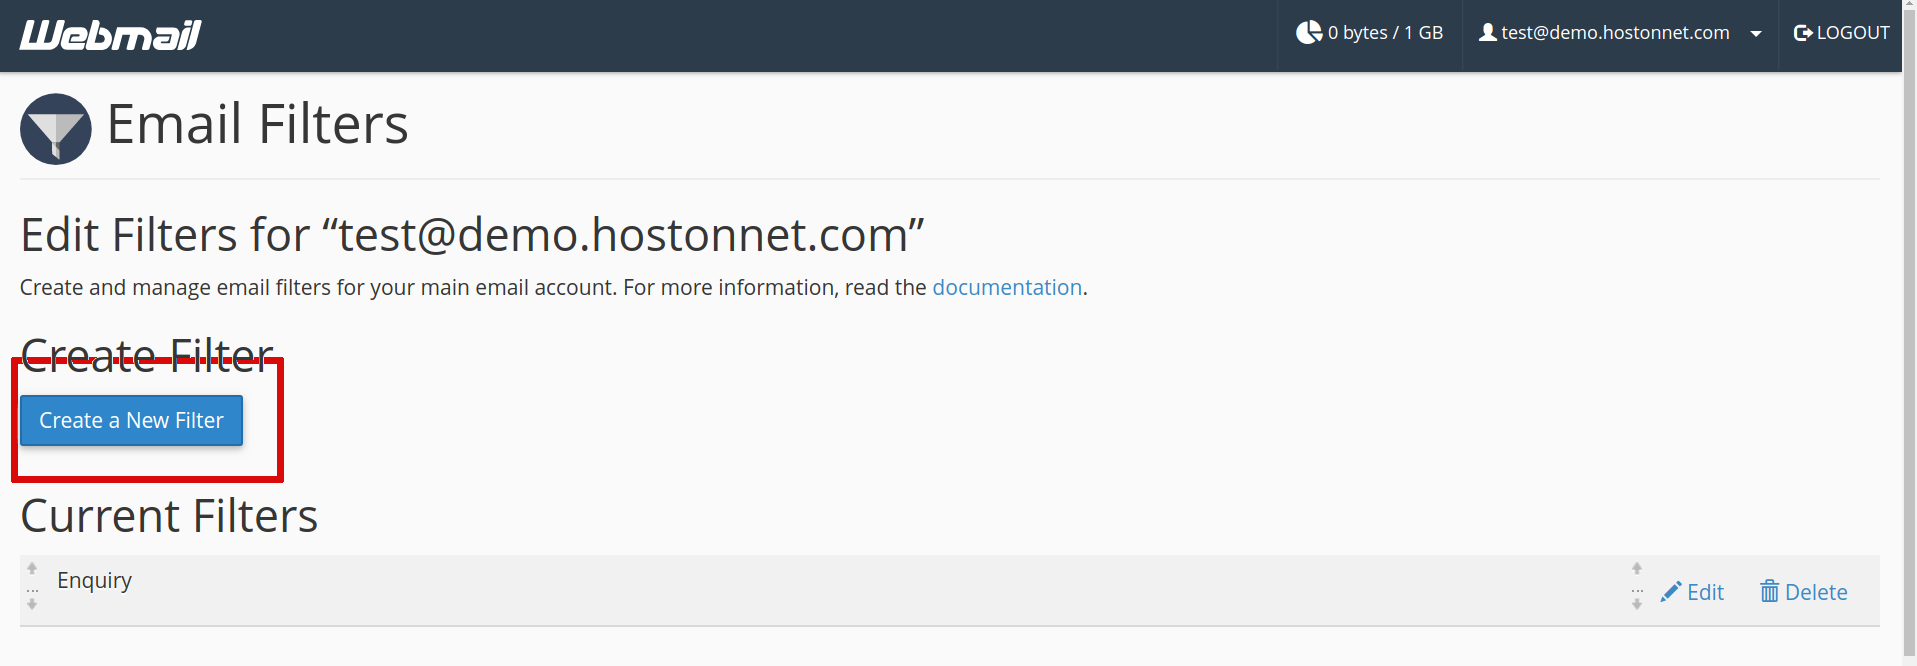
In the next page, click on ‘Create a New Filter‘ button.

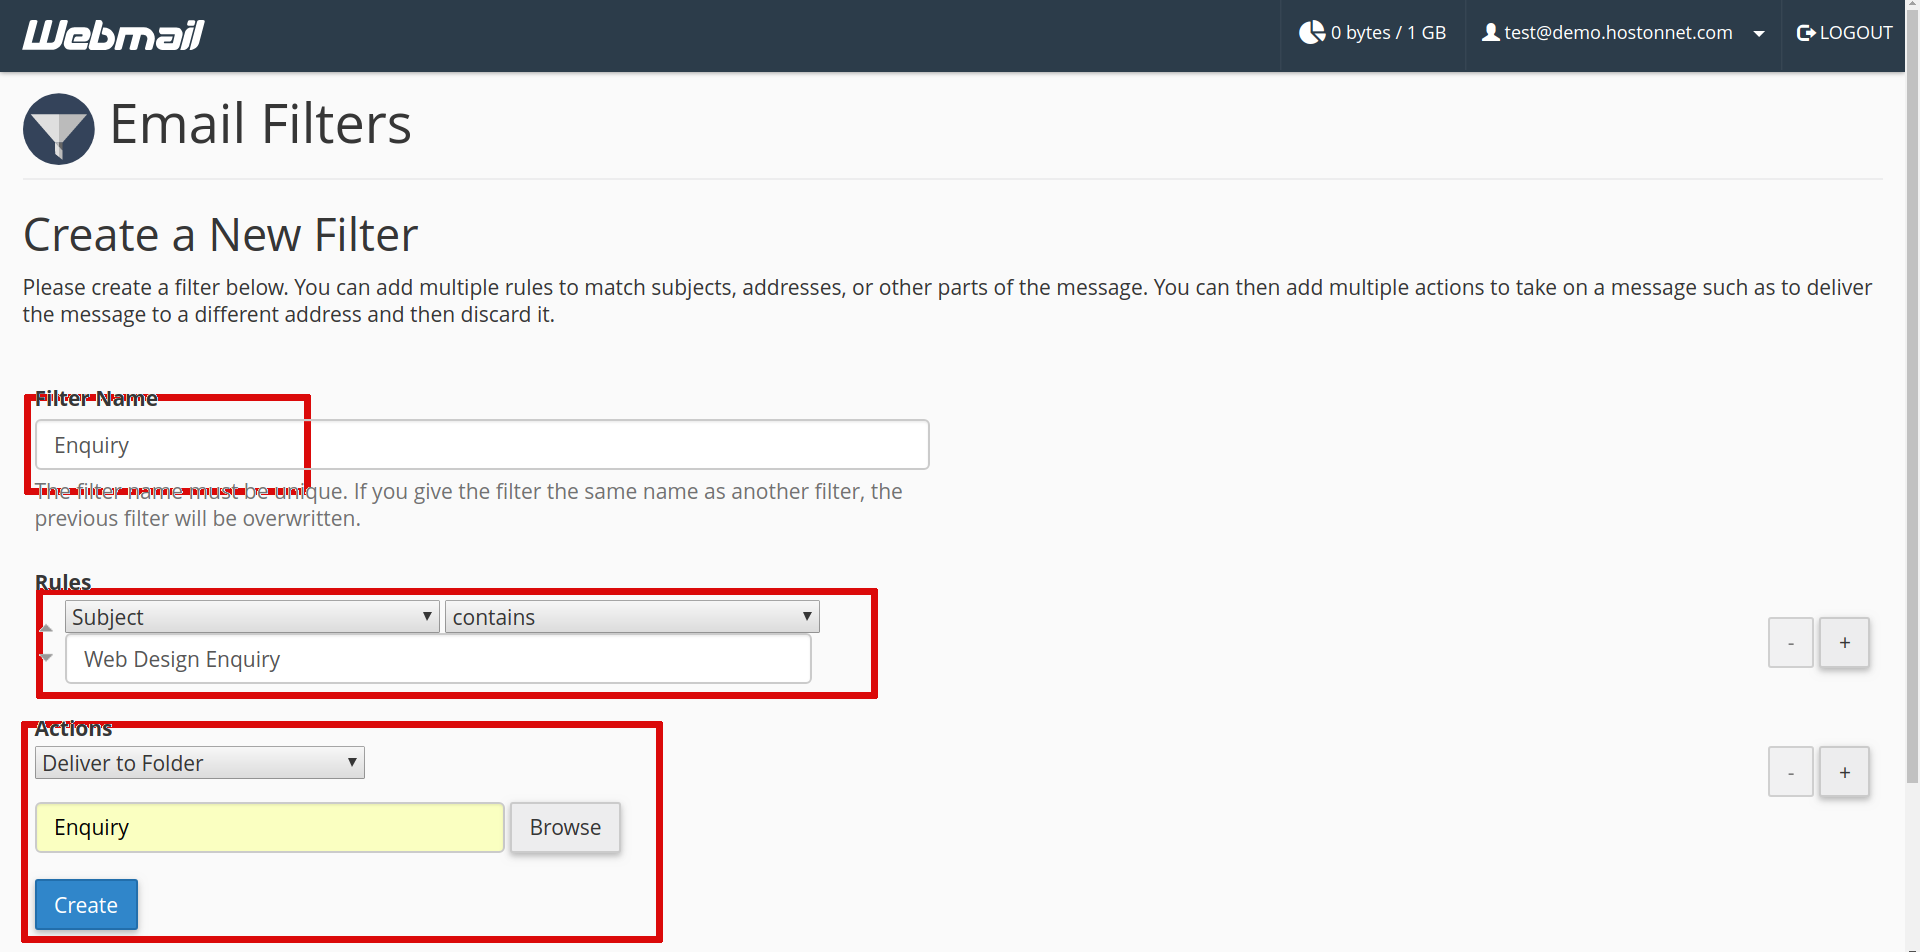
Then enter the ‘Filter Name‘. Here I named it as ‘Enquiry‘

In the Rules section choose your options as needed. This will differ based on your specific needs. In this example, I am creating a filter for any email that contains “Enquiry” in the Subject.
In the Actions section, click the drop-down menu and choose what you want to do with filtered emails. In my example, I want the emails delivered to a “Enquiry” folder.
Once all these set, click on ‘Create‘ button. Then it will show you confirmation message as
You have successfully created a new filter. You can create another one now, or you can return to the filters list.
Email Filter can be added by login to cPanel control panel as well.
For that, Log in to your cPanel > Go to ‘Email‘ section, click on ‘Email Filters‘
In the Filters by Users section, find the email address you want to filter and click the ‘Manage Filters‘ link.
In the ‘Edit Filters‘ for email address screen appears. Click on ‘Create a New Filter‘.

